
This week I’m taking a deep dive into a challenge I had while setting up Quickbooks earlier this year: managing and tracking basic inventory and cost of goods sold with the “simple start” plan of Quickbooks online (QBO) without having to upgrade to the “Plus” level.
I know this post is a little different than most around here, but the Internet is a big place. I hope this post is helpful to someone out there furiously searching Google like I was (and finding nothing). It took me a while to figure this all out on my own, so maybe it will save you a bit of time!
Earlier this year, we made the switch to double-entry accounting and purchased a subscription to Quickbooks Online, and got to work. Here’s my previous post on the switch to QBO if you’d like to check it out.
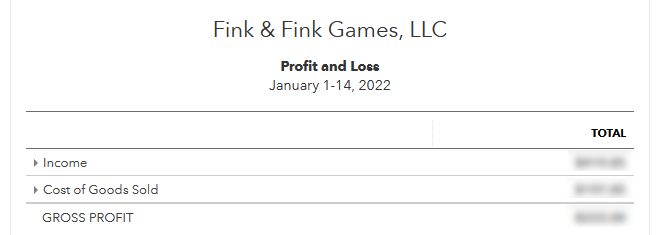
As we sell games we want to be able to subtract our cost of goods sold from the sales price, at the top, so we can get a good idea of what our gross profit looks like. You’ll see this on any income statement or Profit & Loss statement in QBO.
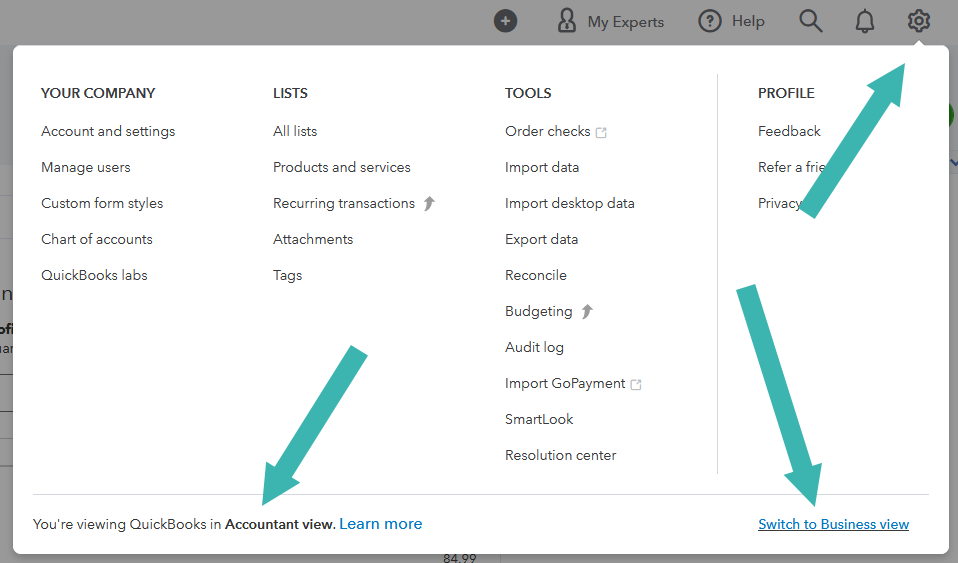
To get started, the first thing you want to do is switch to / make sure you have “accounting view” enabled in QBO. Without this, you won’t be able to configure your initial inventory account and amount appropriately. Click the gears, and look around at the bottom of the pop-up to see if you are in accountant view, or business view.
Now for this next step I ran into a challenge because I already had inventory on-hand. In the future, when we add products, or if I was just starting my business, I’d have an expense from a printer, or elsewhere to sync to the initial inventory count so things will easily work out more easily, BUT because I was just setting up the system I had to first set up an “opening balance” equity account.
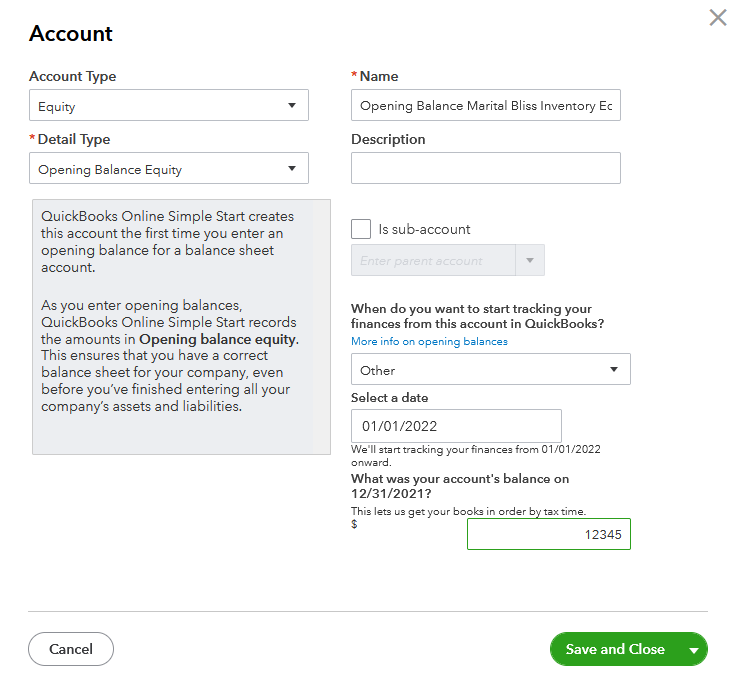
Click the gears, go to Chart of Accounts. And add a new equity account, and choose “opening balance equity” as the detail type. Make sure to choose an appropriate start date if you are planning to backdate your information.
You are also able to enter the starting balance of your inventory here. This is the key part. You need to know exactly how much inventory you have, and what your cost per unit is. Fortunately, my inventory was at a location that’s easy for me to access so I did a count, I also added all my current inventory housed by Amazon. I multiplied the total inventory by the cost per unit, and ended up with a total value. Enter that information here.
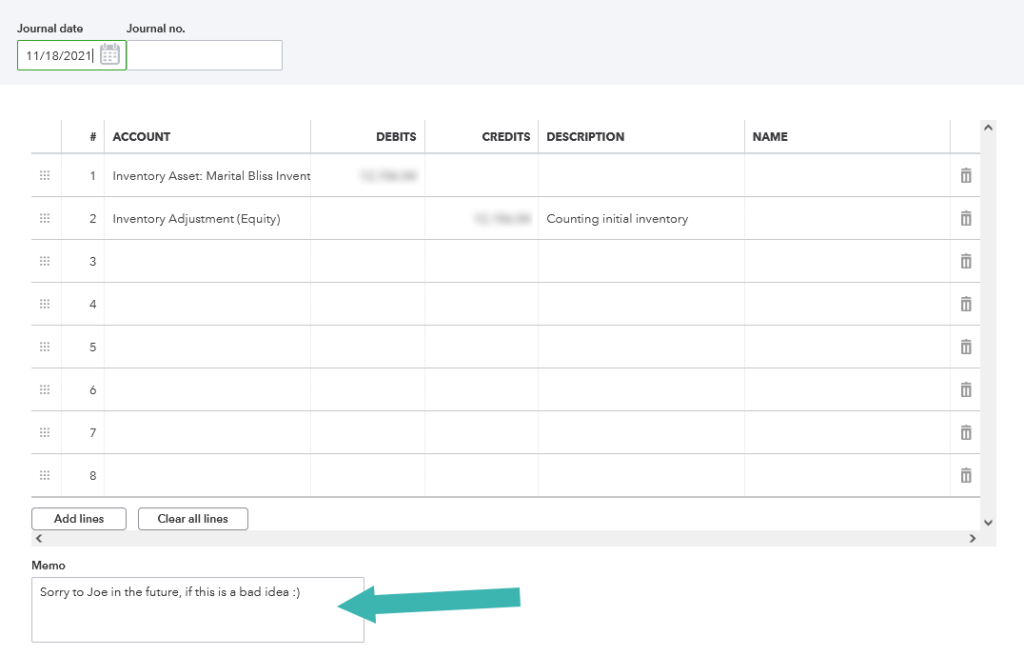
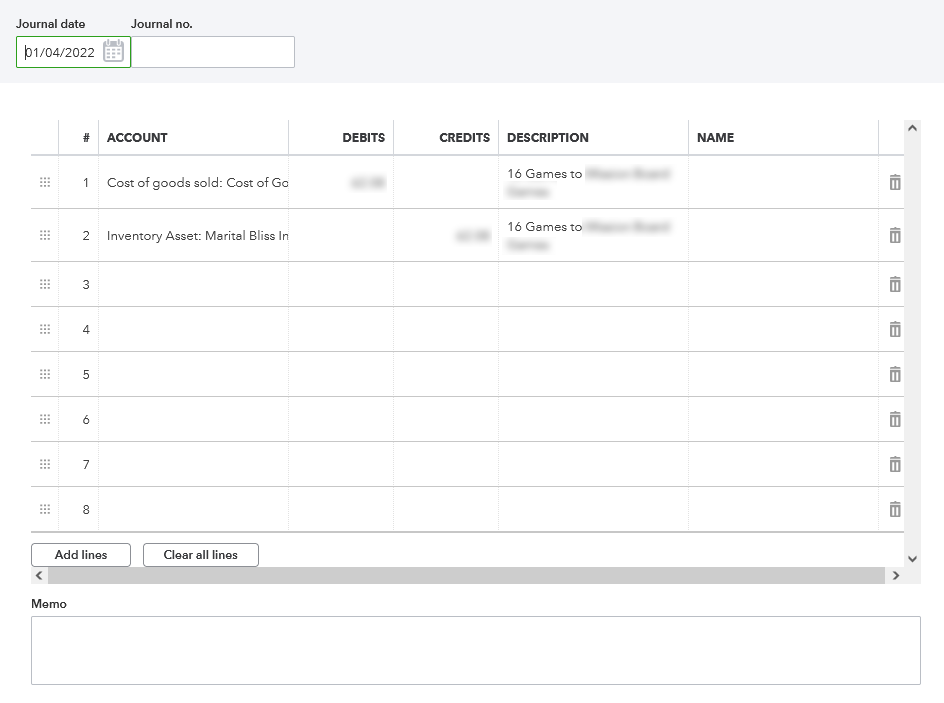
Next, add a Journal entry (New -> Journal Entry) and move that opening equity into an inventory asset. Note – There is probably already an inventory asset in your QBO setup, but I created my own, so I could track the inventory for this unique product separate from others in the future.
Now we’re getting close. Use, (or add a new line) for cost of goods sold in your Chart of Accounts so that every time you settle a transaction you can move a dollar amount from your Inventory and into the Cost of Goods sold. And that’s it! You’re set up. You have an inventory with a dollar value assigned, and when you make transactions, or at the end of the month, do a quick journal entry to debit the COGS account and credit your Inventory account with the total value of units sold, and you’ll always be able to pull a nice running view of your gross profit!
LedgerGurus has been a fantastic resource for me regarding e-commerce, accounting, and QBO. I recommend checking them out.
- Here’s one of their blog posts from February on managing Cost of Goods sold.
- And here’s a helpful YouTube video they posted on the topic as well.
If you have any comments about how I’ve royally messed up my finances, or recommendations about how I can un-mess-up my books… leave them below!
Our updates, your inbox
After subscribing, look for our confirmation email. If it goes to your junk or spam folder, add us to your safe senders list!
Recent Posts
- Where the Heck is Wall Drug?
- Gamification and Weight Watchers (aka Double Dub)
- Drift
- Anatomy of an Announcement
- Being Part of a Community vs. Building a Community
- Re-Release Part 4: A Redesign?
- Re-Release Part 3: Inclusivity
- Re-Release Part 2: Decisions to be Made
- Re-Release Part 1: Making Marital Bliss more Blissful
- What to do When Amazon Deactivates Your Seller Account